Collecting and preparing thrips for study
Thrips species usually cannot be recognized without mounting specimens onto microscope slides. Techniques are best considered under two headings: those appropriate for routine identifications, and those required for archival and taxonomic reference purposes. However, preparation techniques are largely dependent on the care with which specimens are first collected and preserved.
Collecting
Thrips may be collected into a fluid known as AGA, a mixture of 10 parts of 60% ethyl alcohol with 1 part of glycerine and 1 part of acetic acid. This mixture helps to distend the body of most thrips and keeps the body parts supple. However, 80–95% ethanol followed by storage in a freezer can yield good microscope slides, and specimens preserved this way are useful for DNA studies.
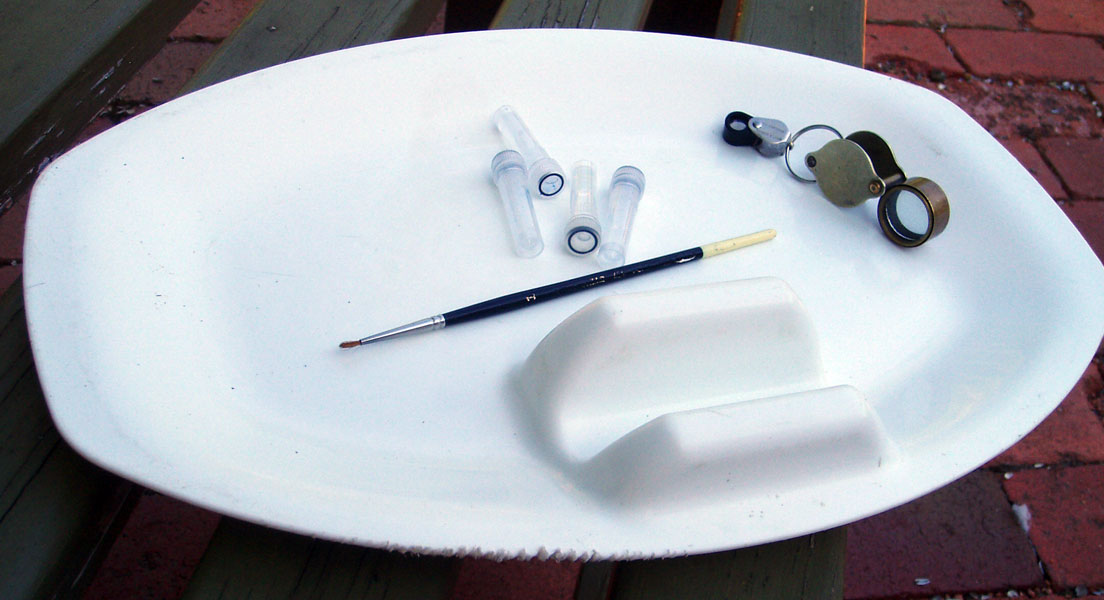
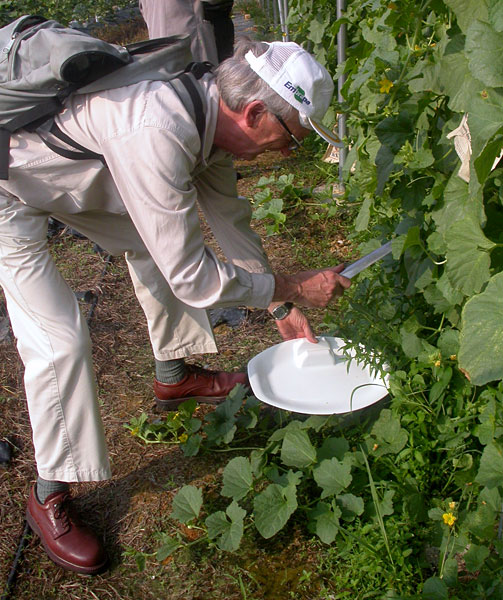 Thrips may be beaten from flowers, leaves and dead twigs. A small but heavy garden trowel is a convenient beating implement. The most convenient beating tray for thrips is a plastic Australian Barbeque tray with a finger grip at the side. The feet of thrips adhere to the plastic surface, and the thrips can be picked off with a small brush or grass stem into the collecting fluid in tubes.
The best tubes for field use are plastic Ependorf Tubes, as used in molecular biology laboratories for centrifuging, because these have screw tops that include a sealing ring, and neither leak nor break. Ensure that each tube contains a label, written in pencil.
Specimens stored in alcohol should be kept in the dark, preferably at temperatures well below 0°C, to prevent loss of color.
A—Slide preparation for routine identifications
The following method is rapid and thus relatively inexpensive. Slides prepared in such media are not 'permanent', but can remain useable for years. This method is recommended for all routine identification work, and is particularly appropriate for larvae and for small pale adults.
- Remove the specimens from the collecting fluid into clean 70% alcohol.
- If the specimens are reasonably flexible attempt to open the wings and straighten the antennae using micro-pins (see below).
- Place a drop of Hoyers Mountant* or CMC 10 Mountant* onto a cover slip (13mm circle). Place a thrips into this drop, ventral side uppermost, and gently lower a slide onto the drop. Invert the slide as soon as the mountant has spread sufficiently.
- When the mountant is dry, ring with nail varnish, and label appropriately (see below).
Comments
The cover slip used should be small — large cover slips crush specimens and need more mountant. The traditional method of mounting a specimen onto a slide and then placing the cover slip onto this with forceps is more difficult and often introduces bubbles of air.
B—Slide preparation for taxonomic research
The objective is to prepare specimens onto slides with their shape and color retained in a condition as close as possible to the natural, living state but with the body cleared so that surface detail is visible. This ideal is difficult to achieve, and a compromise must be adopted.
Most specimens should be macerated gently to reveal fine details of body sculpture and minute setae. A few specimens should be prepared for study without maceration in order to preserve their natural color.
Tools
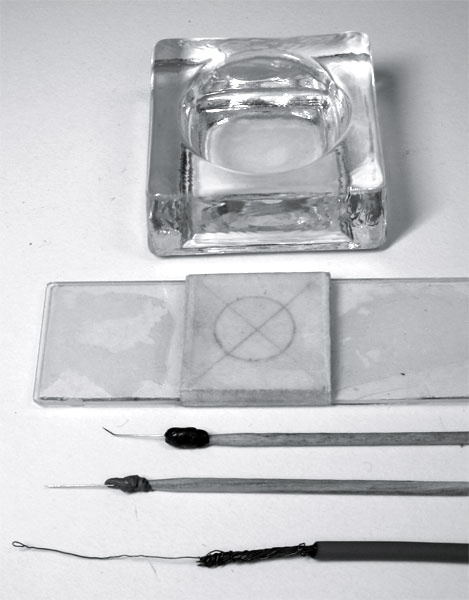 Specimens can be manipulated with fine micro-pins, mounted in sealing wax on match sticks. Use a pair of such pins, one straight but the other with the apex bent. A simple lifting tool to move specimens from one dish to another can be made from a small loop of fine wire. Alternatively, alcohols can be changed in dishes using a fine glass pipette. The most appropriate dishes to use are 'excavated blocks'—glass blocks 15mm high and 40mm square with a median excavation of about 5ml volume, and with a glass lid to prevent evaporation.
Maceration
The objective of maceration is to remove the body contents. This is done by soaking the specimens in a weak NaOH solution for an appropriate period—NaOH solution seems to cause less damage to the body surface than KOH solution. The length of the period of treatment must be determined by experiment.
Students are recommended to experiment with very weak NaOH solution (2%) for longer periods, such as overnight (for black specimens even longer), because a long, slow process is more easily controlled than attempting to get results quickly. Maceration should always be carried out at room temperature; heating causes damage to setae and the body surface. Note that this contrasts with the techniques used for preparation of aphid and coccid specimens.
- Place up to 20 thrips into clean water in an excavated block, but fewer specimens if they are very large; it is best if the specimens float with their wings on the surface. Leave for 1 hour.
- Add to the water an equal volume of 5% NaOH solution. Pale specimens may require only a few hours, but leaving specimens overnight (4.00pm until 8.00am) is convenient. Black specimens may be left for two or more days. This period can be determined only by experience, but should always be as short as possible to minimize damage.
- Transfer the specimens from the weak NaOH solution to water for a few hours, using a needle or wire loop. Gently massage each specimen to expel most of the body contents, and spread the legs and antennae.
- Store the specimens in 60% alcohol for 12 to 24 hours.
Dehydration
Alcohols and clove oil will absorb water from the atmosphere if not protected, particularly under warm humid conditions. The objective of the dehydration schedule is to remove water, then to render the specimens translucent with clove oil. Clearing can be improved by massaging each specimen gently with the back of the bent needle.
- Replace the 60% alcohol with 70% alcohol and leave for about 1 hour; unmacerated specimens must be punctured to speed the entry of alcohols, and the legs, antennae and wings should be spread.
- Replace with 80% alcohol and leave for 20 minutes.
- Replace with 95% alcohol and leave for 10 minutes.
- Replace with absolute alcohol and leave for 5 minutes.
- Replace with fresh absolute alcohol and leave for another 5 minutes.
- Transfer to clove oil and leave for at least half an hour before mounting; if specimens show signs of collapsing, gently massage and stretch each one.
Mounting
To facilitate this process it is best first to prepare a small mounting block. This is done by fixing to the center of a microscope slide a 2mm deep layer of 1 inch square white card. Mark the center of this with crossed lines, and then cover it securely with plastic tape to provide a clean, shiny surface.
- Place a clean 13 mm diameter cover slip onto the mounting block; put a drop of Canada Balsam onto the center of the cover slip and into this place one thrips specimen ventral side uppermost.
- Spread the legs and wings, and straighten the antennae by pressing on the basal segments with a fine needle.
- Invert a clean microscope slide and lower it firmly but gently onto the specimen in balsam on the cover slip. As soon as the surfaces touch, re-invert the slide with the coverslip adhering; this technique usually avoids the inadvertent introduction of bubbles which ruin so many students' slides. [Sometimes it helps to place a small drop of balsam (or xylene if the drop placed on the cover slip was found to be too large) in the center of the slide before touching the balsam of the cover slip.]
- Place the slide onto a hot-plate at once, at about 45°C, to drive off the xylene as quickly as possible. Then dry the slides until they are hard in an oven at about 45°C for several weeks. The quantity of balsam must be sufficient—after it has dried—to support the coverslip without distorting the specimen.
Labeling
An insect specimen is of limited value if it is not labelled with its original data.
- With the head of the thrips directed toward you, the right hand label should indicate the host plant, followed by the country (in capital letters) and then the locality and date, with collector's name (and code number).
- The left hand label should indicate the sex, morph and genus and species names with author, with sufficient room left for any special notes to be added about that particular specimen e.g. measurements, number of wing setae etc.
*Hoyers Mountant must be prepared, as it is not available commercially; CMC 10 Mountant is an excellent alternative available from Masters Company, Inc., 890 Lively Blvd. Wood Dale, IL 60191, (630) 238-9292, [email protected]